Stop Dry Turkey: Master Brining for Unforgettable Flavor & Moisture
The dream of a perfectly roasted turkey often ends in a culinary nightmare: dry, bland meat and a disappointed sigh. We've all been there. That grand centerpiece, whether for Thanksgiving or a special weekend meal, deserves to be succulent, bursting with flavor, and wrapped in beautifully crispy skin. The secret to achieving this elusive perfection isn't just about precise timing or high heat; it's about mastering the art of brining. Learning
how to brine a turkey for roasting is a game-changer, transforming an ordinary bird into an extraordinary feast that will have your guests asking for your recipe.
Brining is far more than a passing cooking trend; it's a culinary science that consistently delivers a significant upgrade in both moisture and deep flavor. It’s a method that enhances the natural taste of the turkey while protecting it from the harsh, drying heat of the oven. Whether you're a seasoned chef or a first-time holiday host, understanding the principles of brining will fundamentally change the way you approach cooking poultry forever.
Understanding the Magic: Why Brining Your Turkey Matters
At its heart, brining is a simple yet incredibly effective technique that leverages the power of salt to elevate your turkey. It's a proactive step taken before cooking that pays dividends in every juicy bite.
The Science Behind Brining for Ultimate Juiciness
When you immerse your turkey in a saltwater solution – or apply salt directly to its surface – a fascinating process called osmosis begins. This isn't just surface-level seasoning; the salt and liquid are drawn deep into the turkey's muscle fibers. This internal infusion seasons the meat from the inside out, ensuring that every morsel carries robust flavor, not just the outer layer.
More critically, brining is a moisture-locking technique. The salt partially dissolves some of the muscle proteins in the turkey. This structural change allows the muscle fibers to relax and, more importantly, to trap and hold onto significantly more water. This extra moisture is precisely what prevents your turkey from drying out during the intense heat of roasting. Think of it as building an internal reservoir of juiciness that the oven struggles to deplete. Even if you slightly overcook the bird, brining acts as a remarkable safety net, ensuring the meat remains tender and moist. To truly appreciate the intricate mechanisms at play, dive deeper into
Unlock Juicy Turkey: The Science Behind Perfect Brining.
Beyond salt, many brines incorporate sugar. Sugar plays a dual role: it balances the saltiness, preventing the meat from becoming overwhelmingly savory, and it contributes to that coveted golden-brown, caramelized skin that makes your turkey visually irresistible. Adding aromatics like garlic, fresh herbs (rosemary, thyme, sage), citrus peels, or bay leaves further infuses the meat with subtle, complex notes that elevate the overall flavor profile.
Beyond Juiciness: Texture, Flavor, and That Perfect Skin
Learning
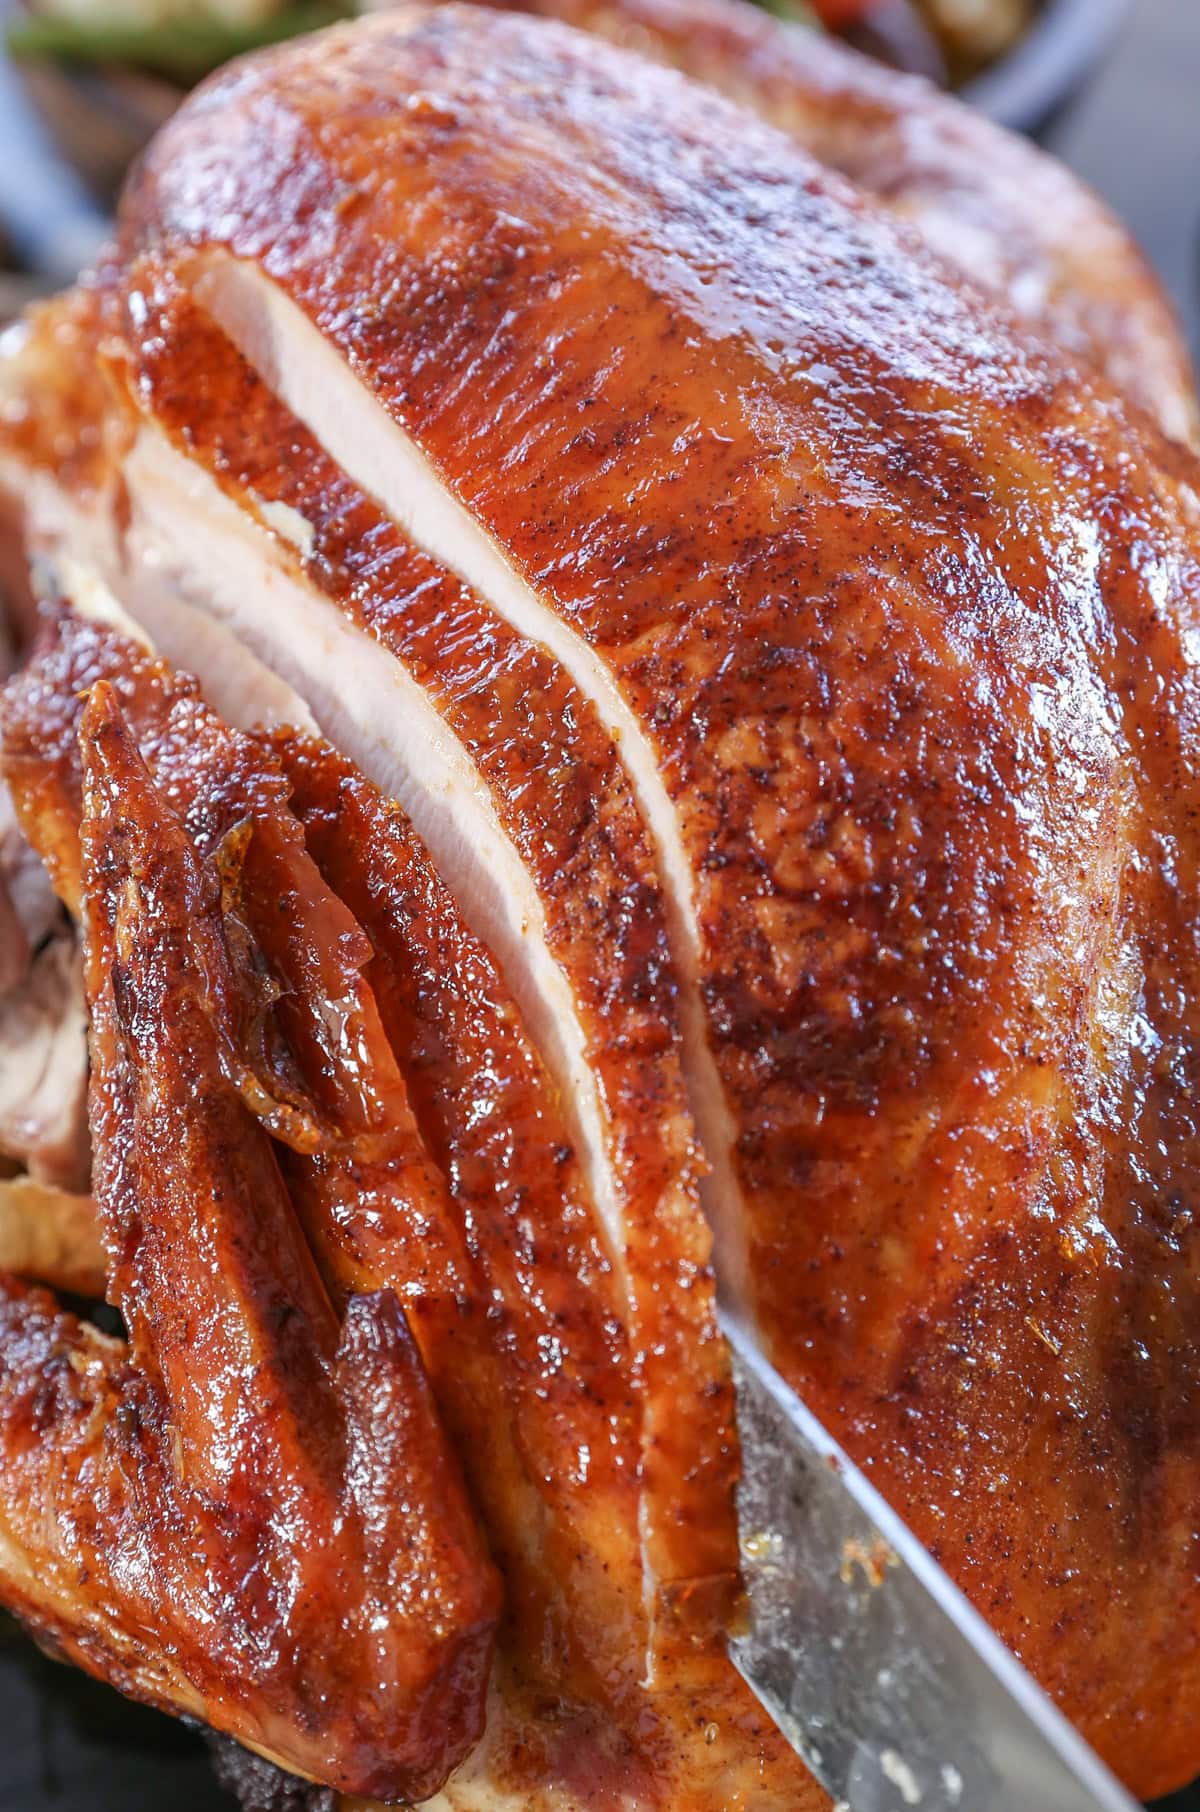
how to brine a turkey for roasting isn't solely about preventing dryness; it's about a complete transformation of the bird. The texture of a well-brined turkey becomes noticeably more tender and succulent. The flavor isn't merely on the surface; it penetrates the entire bird, creating a cohesive, savory experience with every bite. You'll find that the turkey tastes naturally seasoned, complex, and incredibly delicious, without needing excessive gravy to mask dryness.
During the roasting process, the moisture retained from brining creates internal steam within the turkey's muscle fibers. This gentle, internal steaming action helps keep the meat supple and moist, preventing it from seizing up and becoming tough. Simultaneously, this internal moisture pushes outwards, allowing the exterior skin to crisp up beautifully and achieve that desirable golden hue. The result is the perfect balance every home cook dreams of: a moist, flavorful interior paired with a shatteringly crispy, savory skin. For a deeper look into the transformation, read
How Brining Transforms Turkey: Juicy Meat & Crispy Skin Secrets.
Wet Brine vs. Dry Brine: Choosing Your Path to Perfection
Before you dive into the practical steps of
how to brine a turkey, it's essential to understand that there are two primary methods: wet brining and dry brining. Both achieve similar goals but use different approaches, each with its own advantages.
Deciphering the Methods
*
Wet Brine: This traditional method involves submerging the turkey in a solution of salt, water, and often sugar and various aromatics. The osmosis process draws the seasoned liquid into the meat, tenderizing and moisturizing it.
*
Pros: Very effective at adding moisture, provides a consistent flavor distribution, can be highly customized with aromatics.
*
Cons: Requires a large container and significant refrigerator space, can make the skin less crispy if not properly dried afterward, the turkey needs to be fully submerged.
*
Dry Brine: This method involves rubbing a salt-based mixture directly onto the turkey's skin and allowing it to sit uncovered in the refrigerator. The salt draws out the turkey's natural juices, mixes with them, and then gets reabsorbed, seasoning and tenderizing the meat.
*
Pros: Requires no large container or liquid, leads to incredibly crispy skin, concentrates natural turkey flavor.
*
Cons: Doesn't add as much *external* moisture as a wet brine, some argue it's less forgiving if overcooked, requires a longer resting period for best results.
For many home cooks, especially those new to brining, the wet brine is often the go-to method due to its direct approach to adding moisture and its consistent results. This article will focus primarily on mastering the wet brine technique.
What You'll Need for a Wet Brine (and Flavor Boosters)
Gathering your supplies is the first step in learning
how to brine a turkey using the wet method. Here’s what you’ll typically need for a standard 12-16 pound turkey:
*
The Turkey: A whole, thawed turkey (ensure it's completely thawed if frozen). Remove any giblets from the cavity.
*
Water: Approximately 2 gallons of cold water.
*
Salt: 2 cups of kosher salt or coarse sea salt. Avoid iodized table salt, as it can impart a metallic flavor.
*
Sugar (Optional but Recommended): 1/2 to 1 cup of brown sugar or granulated sugar. This helps balance the salt and promotes browning.
*
Brining Container: A food-safe container large enough to fully submerge your turkey. A 5-gallon stock pot, a large food-grade bucket, or even a brining bag specifically designed for turkeys will work. If using a bucket, a large brining or oven-roasting bag can be used to line it for easier cleanup and to ensure food safety.
*
Flavoring Ingredients (Optional but Highly Encouraged): These are where you can get creative and truly make your turkey unique.
*
Aromatics: 2-3 quartered onions, 4-6 cloves of smashed garlic, a handful of fresh herbs (rosemary, thyme, sage).
*
Citrus: 1-2 oranges or lemons, quartered. The zest and juice add brightness.
*
Spices: 1-2 tablespoons of whole black peppercorns, 4-5 bay leaves, star anise, or cinnamon sticks for an adventurous twist.
*
Liquids: A splash of apple cider, white wine, or beer can add depth.
Master the Process: Step-by-Step Wet Brining Your Turkey
Now that you understand the "why" and "what," let's walk through the "how" of wet brining your turkey.
Preparing Your Bird and Brine
1.
Thaw Your Turkey: Ensure your turkey is completely thawed. This can take several days in the refrigerator (about 24 hours per 4-5 pounds).
2.
Remove Giblets: Take out the neck and giblets from both cavities of the turkey. You can reserve them for gravy if desired. Rinse the turkey inside and out with cold water and pat it thoroughly dry with paper towels.
3.
Prepare the Brine Solution: In a large stockpot or saucepan, combine 1 gallon of water with your salt and sugar (if using). Add any hardier aromatics like bay leaves, peppercorns, and halved onions. Bring this mixture to a boil, stirring until the salt and sugar are completely dissolved.
4.
Cool the Brine: This step is CRUCIAL for food safety. Remove the brine from heat and let it cool completely to room temperature. You can speed this up by adding the second gallon of cold water to the concentrated brine, or by adding a bag of ice. The brine *must* be chilled before the turkey is added to prevent bacterial growth. Once cool, add any delicate aromatics like fresh herbs or citrus.
The Brining and Resting Phases
1.
Submerge the Turkey: Carefully place the turkey into your chosen brining container. Pour the cooled brine solution over the turkey, ensuring it is completely submerged. If the turkey floats, place a plate or a weighted bag of ice on top to keep it under the liquid.
2.
Refrigerate: Cover the container and place it in the refrigerator. Brine your turkey for approximately 1 hour per pound, but no longer than 12-24 hours for most turkeys (12-16 pounds). Over-brining can make the turkey too salty or give it a somewhat mushy texture.
3.
Rinse and Dry: After brining, remove the turkey from the solution and discard the brine. Rinse the turkey thoroughly inside and out under cold running water to remove excess salt. Pat the turkey *very* dry with paper towels. This step is critical for crispy skin!
4.
Air Dry (Optional but Recommended): For the crispiest skin, place the rinsed and dried turkey on a rack set over a baking sheet, uncovered, in the refrigerator for another 12-24 hours. This allows the skin to dry out completely, which promotes superior crisping in the oven.
Advanced Tips for Brining Success
*
No Self-Basting Turkeys: Avoid brining turkeys that have already been "pre-brined" or injected with a sodium solution (often labeled "contains up to X% solution" or "self-basting"). This can lead to an excessively salty bird.
*
Monitor Temperature: Always keep the turkey and brine at a safe temperature (below 40°F / 4°C) throughout the brining process. If your refrigerator is too small, use an insulated cooler filled with ice, ensuring a consistent cold temperature.
*
Trussing: After brining and before roasting, trussing your turkey can help it cook more evenly and maintain its shape, leading to a more attractive presentation.
*
Don't Forget the Thermometer: Even with a brined turkey, an instant-read meat thermometer is your best friend. Roast until the deepest part of the thigh (without touching bone) reaches 175°F (79°C) and the breast reaches 165°F (74°C). The meat will continue to cook a few degrees after removal from the oven.
*
Resting Period: Allow the turkey to rest for at least 20-30 minutes after roasting and before carving. This allows the juices to redistribute, ensuring maximum moisture retention.
Conclusion
No more dry, uninspiring turkey! By learning
how to brine a turkey, you unlock a world of unparalleled juiciness, flavor, and that coveted crispy skin. Brining transforms a simple bird into a culinary masterpiece, ensuring every holiday meal or special occasion is truly unforgettable. While it adds an extra step to your cooking process, the minimal effort is handsomely rewarded in the tenderness and taste that will impress even the most discerning palates. So, embrace the science, gather your ingredients, and prepare to serve the most delicious turkey you've ever experienced.